
Assign branding
This guide will show you how to assign branding elements within the Rocketseed hierarchy.
Types of assignments
The Rocketseed Branding is made up of three branding elements. Each of these are assigned in different ways in the Sender or Receiver hierarchy within the Rocketseed Application.
In order for branding to occur, only one of these elements needs to be active. But all three or any combination of the three may be used
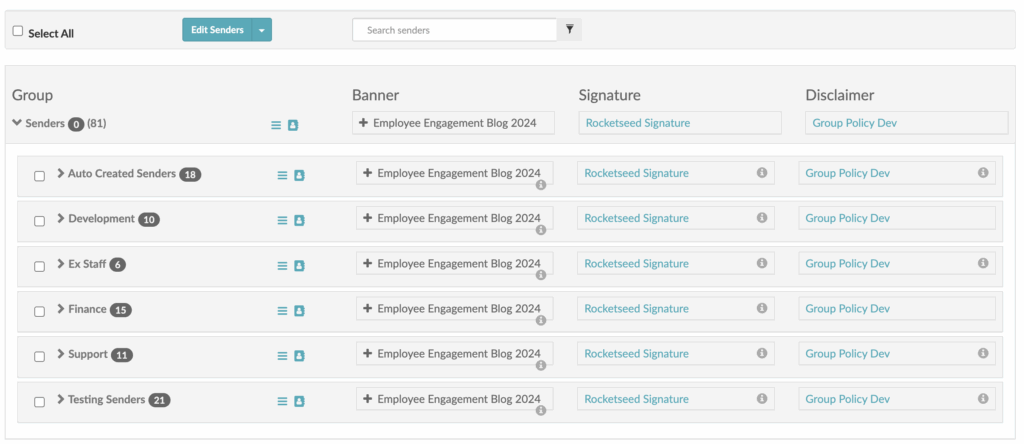
Banner assignments
This is the banner that will be at the top or bottom of your mail as decided by you when choosing your Banner Layout and creating your banner. These assignments are flexible and change regularly as your marketing campaigns change. These assignments also allow for multiple banners to be active at the same time
Signature assignments
This is the signature that will be beneath your most recent email sent in the mail chain and will contain your personal contact information. Generally there are fewer signature than banner designs and these remain constant with only the sender data being updated regularly.
Disclaimer assignments
This is the legal disclaimer that will be placed at the very bottom of the mail chain. This is usually the most static of all the branding elements and usually remains unchanged once it has been created and assigned.
Which banner will it choose
As stated above, there can be more than one banner assigned at the same time. This means that often 2 or more banners will pertain to any sender’s email branding. The Rocketseed Application will then randomly choose between the banners and apply one of the banners to the outgoing email.
Assigning a signature and / or disclaimer
Signatures and Disclaimers are can be assigned to the account as a whole, to specific groups within the sender hierarchy or to an individual and are assigned using the same mechanism. Assigning to groups of senders is the most common practice and will be covered in the steps below.
In the sender hierarchy, click the “Edit Group” button from the hamburger menu of the group you want to have own the assignments0
Expand the “Email Branding Preferences” section for the selected group and navigate to the “Signature Template” and / or “Disclaimer Template” sections.
Select the relevant templates from the drop down lists provided.
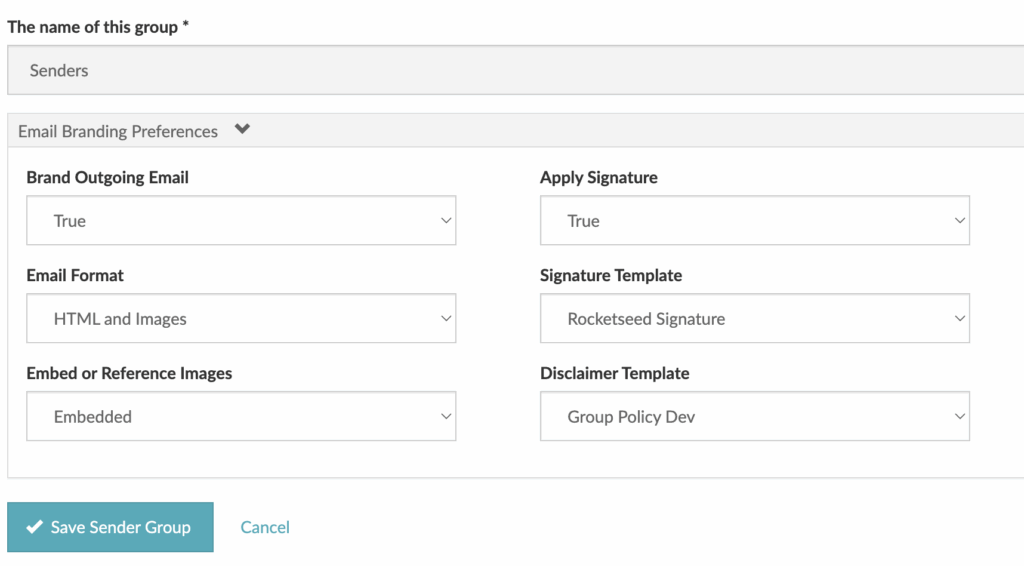
Click the “Save sender group” button and the new assignments will become active.
Assigning a banner
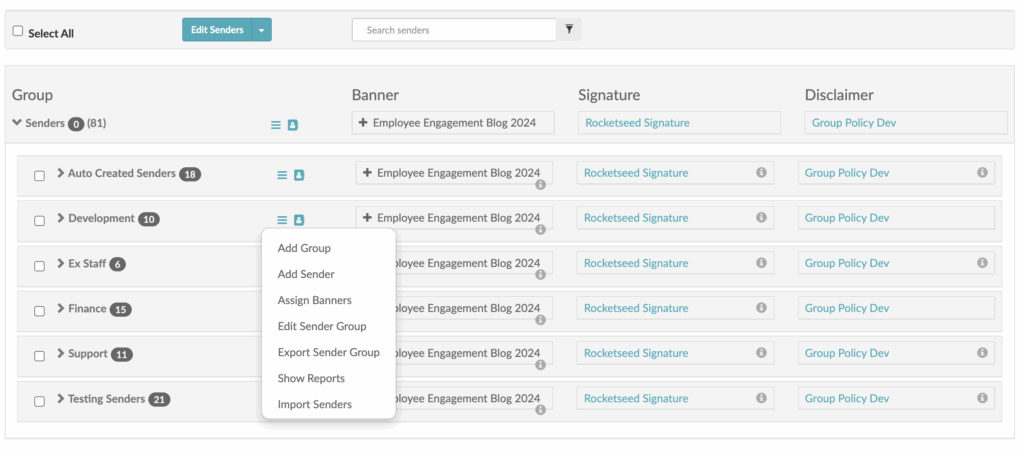
To assign a banner or banners to a group within the hierarchy, select the “Assign banners” option from the relevant group’s dropdown menu.
The list of all the available banners and the groups they are in will be shown in a hierarchy. Expand the hierarchy using the + until you see the banner or banners you want to assign as shown below.
Click the checkbox for each banner you want to assign, the banners will then become highlighted so you know which are going to be assigned.
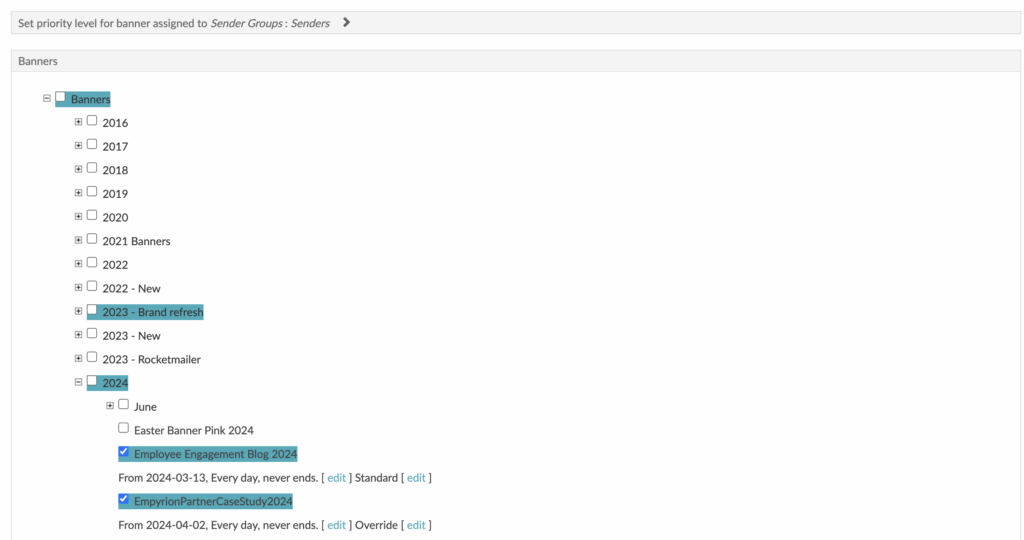
The default assignment dates are from the current date and time without end. If you want the assignment active immediately, click the “Save” button.
If you want to future date your assignment or add a specific end date, expand the “Set active dates” section.
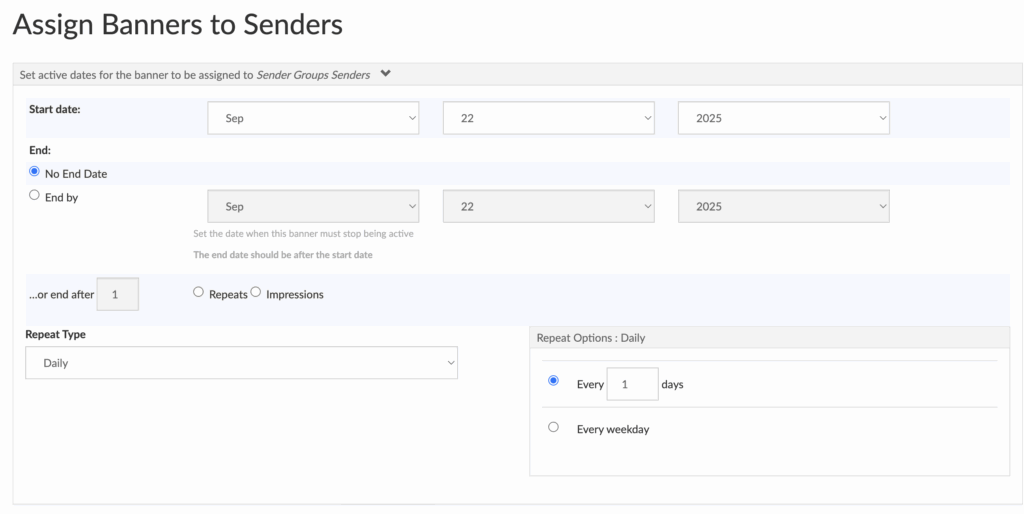
You may now enter a start and end date or change the start date and leave the end date unset.
Click “Save” and your banner assignment(s) will be saved.